
Getting Started
Overview
Getting started with MyPlace takes four steps: connect your WiFi controller, map it to a location, brand the guest portal, and test it with a phone. There is no new hardware to install — MyPlace works with the WiFi network your venue already runs. Once the portal is live, every guest who signs in to your WiFi becomes a contact you can see, analyse and market to.
This page walks you through the sequence. The details of each step live on their own pages, linked as you go.
What You Need Before Getting Started
Two things, and the second one trips people up far more often than the first.
A WiFi network managed by a supported controller. MyPlace connects to the platform that manages your access points — UniFi, Meraki, Omada and others. Step-by-step setup instructions cover ten WiFi brands in the WiFi brand integration guides. If you are not sure whether your controller runs in the cloud or on hardware in the building, Cloud controller vs local hardware explains how to tell — it decides which credentials you will need.
Administrator access to that controller. This means the account you use to sign in to the controller’s own management platform — a UniFi account, the Meraki dashboard, an Omada controller login and so on. User credentials describes what each kind of access looks like.
Important: The login for the router your internet provider installed is not the one you need. MyPlace talks to your WiFi controller, not to the ISP’s box, and the two have different admin accounts. If the only password you have is the one on a sticker under the ISP router, ask whoever set up your WiFi for the controller login before you start.
The Four Steps
Step 1: Connect Your Controller
In the MyPlace Admin Panel, open Networks → Network Controller and click Add New Controller. Pick your vendor from the list and the wizard asks for that vendor’s credentials — the vendor guide for your brand shows exactly which fields to fill and where to find the values.

Step 2: Map a Location
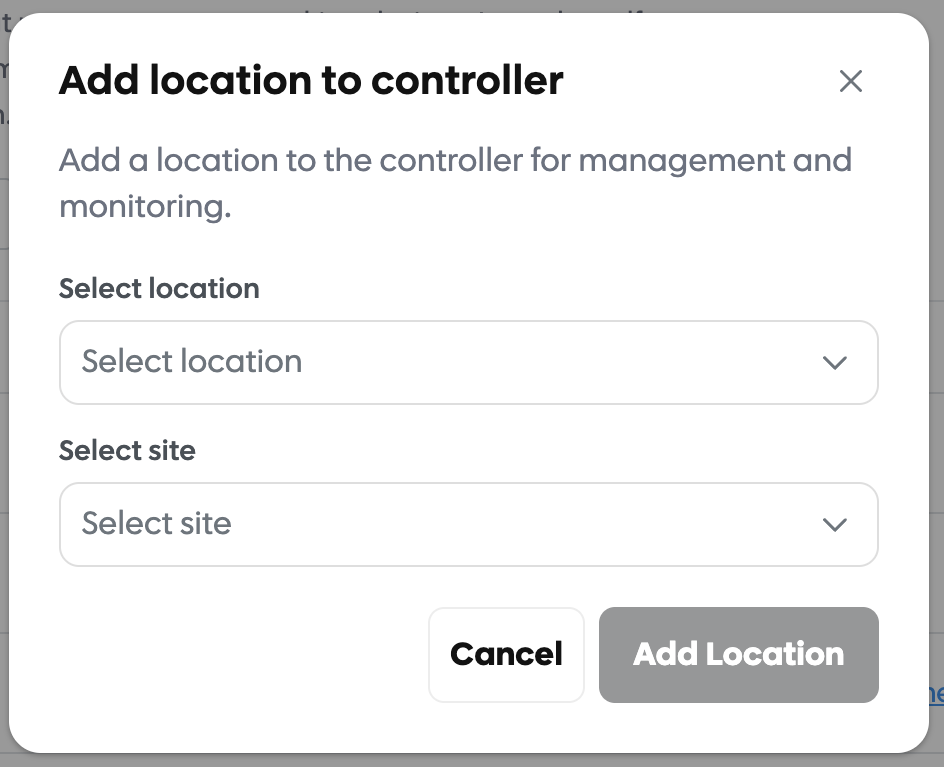
A controller can manage several sites, so the next step tells MyPlace which of them is your venue. Click the + icon on the new controller’s row, pick the MyPlace location and the matching network on the controller side, and MyPlace applies the guest portal configuration for you. What exactly is written — and what is deliberately left alone — depends on the vendor, and How MyPlace connects to your WiFi covers the general shape.
Step 3: Brand the Portal
Open Settings → Guest Experience. The Branding tab takes your logo, and the Welcome Screen tab holds the greeting, description and button text your guests will read. The Preview button shows your changes as you make them, and Open Portal opens the real page guests will see. This step is optional in the sense that the portal works without it — but it is your venue’s name on the WiFi, so it is worth the five minutes.

Step 4: Test It With a Phone
Connect a phone to the guest WiFi and walk through the portal once, as a guest would. A successful sign-in shows up in Guests within a few seconds — that is your confirmation the whole chain works. If anything looks off, open Settings → Local Network → Guest Portal Configuration: it reads the live settings back from your controller, and the Health Check button on the same page validates the set-up against what MyPlace expects.

What Happens After a Guest Signs In
This is the point of the whole exercise, so it is worth knowing what to look for.
Every sign-in appears in Guests, building a list of real visitors with the details they shared on the portal. Analytics turns those sign-ins into the patterns behind them: how many guests visited, how long they stayed, and which hours of the week your venue is busiest. The same guest data feeds the rest of the platform — review requests, the loyalty card and your marketing integrations all draw on the list the WiFi builds for you.
None of this needs further setup. From the first test sign-in onwards, the data accumulates on its own.
Getting Started Without a WiFi Network
You do not need working guest WiFi to create an account. Sign up, explore the dashboard and set up your branding first — then connect the network whenever it is ready, whether that is new Ubiquiti UniFi hardware going in next month or an electrician still running cables. The four steps above wait for you; nothing expires.
Support
Stuck on any of the steps, or not sure which controller your venue runs? Contact the support team via the Contact Us page and we will walk through it with you.